Ok, ok. I admit it: I did not complete 31 projects in 31 days. I just didn't make it. But I did get super close! I blogged about 26 projects and I have at least 3 more that still haven't been posted, but even so that only brings us to 29 projects total. Sad day. But it's ok because I still got lots of stuff done and I learned things about myself. And, as Stephanie always says, every day should be a learning day!
I learned that it is way better to be doing something in the time I'm not working instead of just watching tv shows online, even if I think I'm so tired I could fall asleep at 8 pm (because I will never, ever actually get in bed before 11 pm). I learned that I love making things, not just books, and sometimes making other things is even more satisfying that making books! (Is that ok to say? I still like making books too, just maybe not all the time all the time.) I learned that sewing never takes as much time as I think it will (except when the machine freaks out and then it's just best to walk away and come back later), that pictures are best to take right after I've finished something, and blog are better with stories and the good ones take longer to write than I think they will. I learned that sometimes the rewards of having at etsy store are just so that I can say that I have one and not to actually sell anything (in other words, I'm a terrible promoter but I'm not thinking about that right now). I learned that it really is better to measure twice and cut once. I learned that maps are the most fun kind of paper and that they are everywhere. Also that rubber stamps can cool, not lame. I learned that some projects take longer than others but that doesn't mean that short projects aren't fulfilling. I learned that the longer I sit and stare at my work table the less inspired I am to go back up there the next time: when I'm tired, I just need to leave. I learned that even though I have a craft room I still craft all over the house and always manage to leave my scissors in the kitchen when I need them on the third floor, and vice versa.
I learned that I like being crafty in my own way because crafting make me happy.
Showing posts with label 31 projects. Show all posts
Thursday, June 3, 2010
Sunday, May 30, 2010
project #26: cardigan pocket
I love pockets. That's a fact. One of the reasons I wore boy pants mostly growing up is because they have better pockets. (Also they weren't as tight.) You may remember this gray cardigan from project #1. I'm still wearing it, even though the weather's started to get warmer, and while I loff loff loff it, one of the things I've always felt it was lacking was a pocket. I usually carry my cell phone in my back pocket, but sometimes when I'm babysitting and I'm holding a child and it buzzes it's just too hard for me to pull it out to see if it's their mother calling to say that she'll be home soon and can I get the kids ready for swim class? When I'm wearing a sweatshirt or another cardigan with front pockets it's so much easier to pull out. So I decided to add one to my favorite keeps-me-warm jacket.
The pocket itself is actually made out of the sleeve of an old t-shirt of mine. Both the shirt and the cardigan originate from the same old boyfriend, though I've finally admitted to myself that I've outgrown the shirt. Sad day. I do however love the fabric of the shirt (as well as the fact that it has my face on it), so I wanted to try and preserve it in some way. I cut the sleeve off, did some folding, cutting, and sewing and bang! instant pocket. The cool part about it being a sleeve, though, is that I kept it doubled so it's actually a secret double pocket! Secrets! Double! Pocket! My favorite!
I have some plans for the rest of the shirt—I'd like to preserve the portion with my spray-painted face if possible (it's inspired so many other shirts that it would be a shame to lose the original completely). We'll see if those other plans ever materialize.... But, in the mean time, I will be enjoying my new pocket. Fo sho.
project #25: map basket . . . sort of
So remember that map basket I made that I liked so much? Well I had a bunch of maps left over (and I still do) so I thought I would try and make another one. I decided that I wanted this basket to be long and skinny instead of squarish and tall. Good plan! Clearly that didn't happen. I realized pretty early on that it wasn't taking the shape I had expected it to, but I thought I should just keep going and see what would happen, if for no other reason that to check another project off the 31 list.
It reminds me of half an egg shell, like the egg's been broken open and this is all that's left. A rather angular egg, that is. I almost (almost!) want to make another one and fit them together or something so it could be complete. When I was finishing it off I started to make the sides a little higher, but realized that some of my weaver's weren't long enough so they wouldn't make it. At that point it looked a little bit like a baby basket, which was kind of cool too. What I learned from this project? Even if you think you can make your weavers different lengths, it's pretty much never a good idea. It's way easier to have all your weavers the same length, then cut them down afterward than to start with some of them too short and have that limit the shape your basket can take. Now I know for next time. (Although I still have no idea how to make that long skinny basket of my dreams.)
The first basket I made is currently serving the purpose of a desk top paper recycling in my room. Maybe I can use this new one in the craft room to hold things like fabric scraps or finished books or something. Or maybe something completely useless like the multitude of dominoes Garrett and I bought at the thrift store a few weeks ago...
Saturday, May 29, 2010
project #24: kiboko the hippo
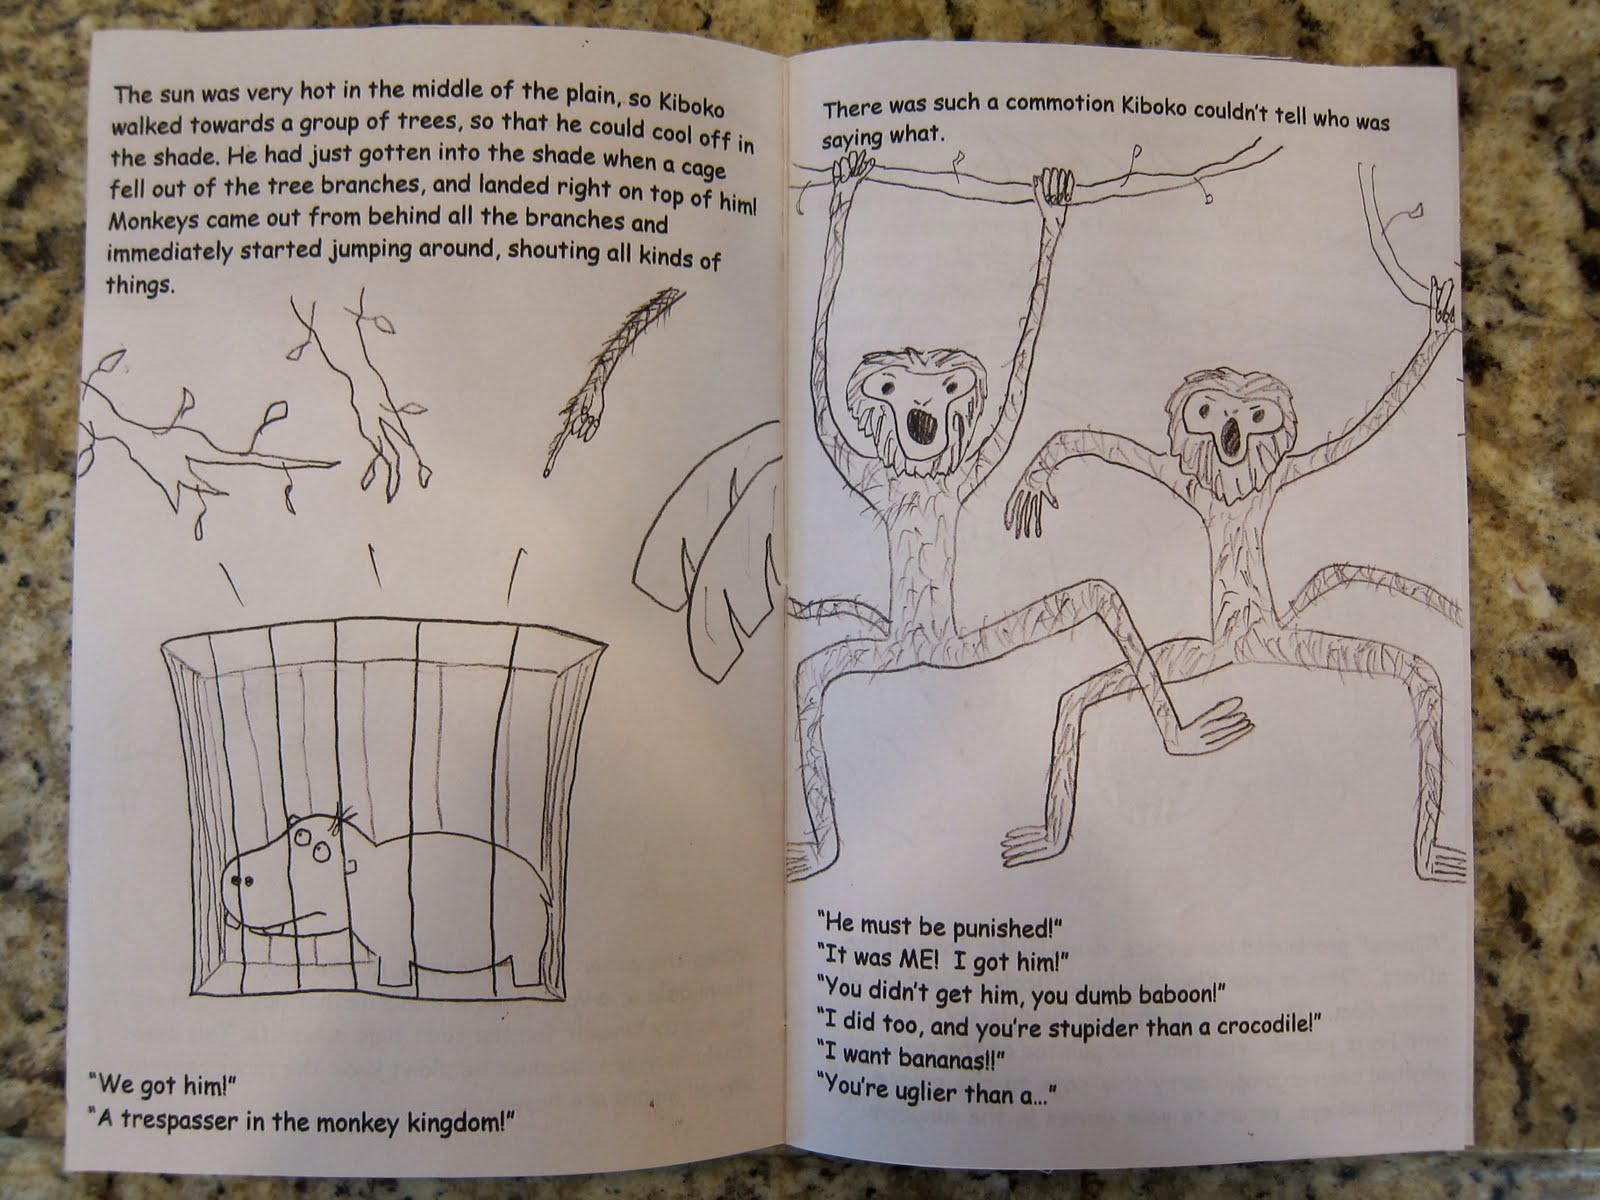
For Mother's Day my friend Matt had a brainstorm: he would write a book about a little hippo and his mom (hippos are his favorite animal). He would have his friend Isaac illustrate it, have me bind it into a book, and then give it to his mother for Mother's Day. Great idea! Too bad he came up with it about three days before Mother's Day. Needless to say, it was not ready in time. However, here we are almost a month later and it's done! Matt did all of the writing and formatting himself, though Issac and I both helped a bit with the editing. It's a pretty cute story about one hippo's journey home and his discoveries about the meaning of life, the universe, and everything. Here are some teaser pages to peak your interest:
I printed out three for Matt (one for his mom, him, and Issac) but I'm thinking about making some more and putting them in the shop. Thoughts?
project #23: mix-tape book
This project has been bouncing around in my brain for a while now and is one of the crazier books I've done. It seems like I've been seeing cassette tapes everywhere these days, from the backs of laptops to hand bags and I thought I'd get in on the action. The cool thing about cassette tapes is that they have already made holes, so I don't have to do any punching, just sewing which was nice.
I used some of that telephone wire because I thought it would go well with the technology theme of the book. Initially the binding was going to be a coptic style, but it ended up more like the long stitch, which I think suits the book just fine. The crazy weaving and winding that happens on the cassette tapes themselves was purely experimental and free-form. (I'm sure that's fairly obvious...) The wire was surprisingly easy to work with. I didn't rip any pages or have much trouble pulling it through the various holes. A pleasant surprise to be sure.
I liked the classic black cassette, but Matt (who supplied me with the used tapes and recently told me that it is his life goal to make it on to my blog as many times as possible) could only find one, so the back is a clear tape. I really like the look of the front, though. The hand-written song list really adds to the whole flavor, I think.
I used graph paper for the inside because it is my favorite: it offers such versatility! It also seemed to lend itself well to this book because it suggests that the pages can be used for anything, not just words: guitar/bass tabs, technical drawings, or repeating patterns would also be at home here. All in all I think it came out really well!
project #22: fossil earrings
While I was looking for some beads for the necklace adjustment, I ran across two stones that my Aunt Terrill had given me years ago after we had visited them in the Upper Peninsula (the U.P.) of Michigan. ("If you seek a pleasant peninsula, look about you.") While I was in the jewelry mode I decided to do something with them: make earrings.
These stones are called the Petoskey stone and are the official state stone of Michigan. (Who knew that states had official stones? PS The New Jersey doesn't have one.) These stones are actually the fossil remains of one of the first forms of animal life on earth. Kinda cool, right? I like how smooth and shiny they are: it really shows off the fossil shapes nicely. Fun fact: the shine comes from polishing, not by being waxed or varnished or lacquered. (Or so says the official little paper from which I've acquired all the other interesting little tid-bits about the stones.)
project #21: necklace adjustment
A few weekends ago my mom went out to St. George with her three sisters for a sister's weekend. While there my mom and her oldest sister Taunya fell in love with this necklace. They decided to buy it together: my mom would get it first, then after six months she would send it out to her sister to keep for six months, etc. However, they both decided that it was a little too short for their tastes, but bought it any way in hopes that I could alter it for them. Well aren't they lucky that they were right!
Here the necklace is unaltered. You can see that the biggest hanging bead hits me right on my collar bone. It doesn't look bad with the line of my shirt, but the moms were looking for something that was less choker-esque.
We measured and decided that we needed to add about 6 inches, or 3 inches on each side. I found some small black beads and larger black and white beads that would compliment those already on the necklace and added them to the back when I restrung it. Ta-da! Done. When I showed my mom she said, "I love 31 Projects!"
projects #18, 19, 20: pop-up cards
I've never been a big fan of pop-up cards: I've always thought that they were a little cheesy. However, since taking my class with Esther I've been inspired to look through my copy of Magic Books and Paper Toys. In it Esther has some cute, simple pop-up card ideas, and I decided to try some with the kids I babysit. This served me well when I went into the city for my internship the first day. An Indian book artist and her family were in town and Esther had them come up to the studio so they could share their work with each other. She had two boys, 7 and 14, and they were very polite but clearly bored during the meeting. After a little hesitation on my part, I decided to make some little crafts with them to distract them so the adults could talk, and we ended up making some of these cards, too! The youngest boy came up with some really fun pop out shapes of his own design: he clearly takes after his mother.
Since Mother's Day was coming up (this was about a month ago that I started doing these) I started with the idea of a heart popping out of the middle. Because it popped out so far you could see inside the card a lot, so to compensate I decorated the inside with multicolored polka dots. The little girls I showed this card to were big fans.
This was another fun card. When you open and close it the bird's mouth also opens and closes. I drew a little nest underneath him to support his tiny body that is supporting his giant head.
Travis, a little boy I babysat once with his brother and sister, made me this version of the bird card. I love how he wrote "cheep cheep" inside the mouth instead of in a word bubble. I also love the little bird feet poking out the bottom!
This card was just a simple pop-out triangle. I'd seen these done where the triangle stands on one point and the opening opens to the sky, making a cup or vase shape, so I wanted to try it the opposite way and see what I came up with. Thus the umbrella card was born. I colored the inside of the card on this one as well so that it looked like the inside of the umbrella. I also drew the handle as if it continued inside as well. Kinda cute, but I'm not really sure whey you would give someone this card. Maybe if you knew an old man who snored a lot? ("It's raining, it's pouring, the old man is snoring...")
Here's that same shape facing the opposite way. Of course I had to make it a carrot.
Here's another that's taller and thinner. I drew some little flowers, cut them out, then glued them on to make this card. It's pretty, but it doesn't open flat. Oops.
So, lesson learned, sometimes it pays to revisit an old idea: you can usually find a way to make it better than you thought.
Tuesday, May 25, 2010
project #17: envelopes
So remember those map cards that needed envelopes? I found 5 that were a good size, but then I couldn't find any more, so I made some. I just took a regular envelope and trimmed it down. I did this fancy cut thing so there was a flap I could fold inwards and glue down to make it like a regular envelope. It even has the lick-able strip so you can seal it!
Look! The card fits in so nicely! It is lovely.
Here it is closed. Looks pretty good, huh?
Look! The card fits in so nicely! It is lovely.
Here it is closed. Looks pretty good, huh?
Monday, May 24, 2010
project #16: map cards
I recently purchased an amazing traffic report stamp set on Etsy from seller WhitesHaven. I am in love with them! ("The Forbes Accident Report shows all the details plainly.") And, continuing with the map theme from yesterday, I stamped them on some cards I made out of pages from a tiny atlas Matt found at the dump for me. Yes. Fact.
I am a big fan of using natural features of found paper in the final product. I once made a journal for my dad using paper from a spiral bound sketchbook and instead of ripping the pages out and cutting off the rough edges, I unwound the plastic spiral and used the holes left over as a decorative feature. Keeping in that vein, I unhooked these pages from their plastic binding so that the rectangular holes left behind could be a decorative border along one edge.
On each card I picked a fairly long road and stamped the cars along it, making it look like maybe they are driving on that road on a journey full of adventure! There is a lovely arrow that points the way of their travel to parts unknown. I stamped both the front and back of the cards so that you can decide which side you want to be the front.
I also lined each card with graph paper (the maps were just too dark and dense to allow for writing on them directly) so you can decide if you want your card to open up and down, or side to side. Graph paper is one of my favorite types of lined paper and it never ceases to amaze me.
I made ten of these lovely little cards, but I've got plenty of pages left to make more. Now all I need to do is figure out what to do about envelopes...
I am a big fan of using natural features of found paper in the final product. I once made a journal for my dad using paper from a spiral bound sketchbook and instead of ripping the pages out and cutting off the rough edges, I unwound the plastic spiral and used the holes left over as a decorative feature. Keeping in that vein, I unhooked these pages from their plastic binding so that the rectangular holes left behind could be a decorative border along one edge.
On each card I picked a fairly long road and stamped the cars along it, making it look like maybe they are driving on that road on a journey full of adventure! There is a lovely arrow that points the way of their travel to parts unknown. I stamped both the front and back of the cards so that you can decide which side you want to be the front.
I made ten of these lovely little cards, but I've got plenty of pages left to make more. Now all I need to do is figure out what to do about envelopes...
Sunday, May 23, 2010
project #15: map basket
My friend Jen and I used to go to Border's a lot when we were in college. We went there so often that we made up a name for a cashier that we saw there almost ever visit. We dubbed him John Paul, but his real name was Kevin. He had very impressive dark curly hair and he was nice and tall. Once Jen said he was flirting with me while he rung me up. I did not notice. Fact.
Anyway, on one of these visits to the land of books I discovered Craft Magazine. I was instantly in love. The first issue I bought had the instructions for how to weave a basket out of old maps. I had recently acquired many maps upon learning that I could get them free from Mr. Grape in the Harold B. Lee Library on campus (second floor through the science section) so this was the perfect craft! Of course it only took me like 2 years to get around to finishing it. No big deal.
This is attempt number 1. I misunderstood the directions and wove half of one side with half of another, instead of the two halves of the same side together. It reminded me a little bit of a jester's hat or something. I couldn't figure out why the holes near the bottom of the basket wouldn't disappear, but once I realized my mistake it all became clear.
You can see that the bottom curves inwards pretty dramatically. I was fairly certain that no amount of reshaping, even efforts made overnight, would correct its awkward shape. My mom suggested that maybe the points could work like feet and if I exaggerated them by folding the creases more sharply than it would look intentional and kind of cool instead of like a mistake. She was definitely on to something, but I wanted to make the basket like it was supposed to be made, so I decided to take it apart and start over.
Surprisingly the un-weaving hardly took any time at all and luckily the maps were no worse for the wear. The second finished basket looked a lot more like what I had been expecting. Notice that the bottom is now slightly rounded outwards instead of crazily concave and pointy. Let's be honest, as interesting looking as the jester basket was, this one is much, much prettier.
When I finished I folded the stray ends around each other and wove them back inside so you can't see where they end. In the instructions it said to just weave them back in a little bit and then snip off the extra, but I don't see any reason why you can just weave them in until they're hidden completely with no snipping at all. It can only make it stronger, right? Plus, no waste. This basket was made using two full aeronautical maps, if I remember correctly.
Here you can see it sitting on my (newly cleaned off) desk. It measures about 5 in. by 8 in. I was pretty pleased with how it eventually turned out. Now that I've sort of got the hang of how weaving works I want to try and make a basket that is more shallow and oblong in shape, sort of like the yellow basket you can see to the left in the picture. I figure the idea is the same as this map basket but the base would be rectangular instead of square and some of the weavers could be shorter than others. Maybe 1/3 of the length or something? I'm not exactly sure, but it's definitely something to think about.
PS I made this entire project, reworks and all, while watching the show Lie To Me on Hulu. I am pretty much obsessed (and think you should be too).
Tuesday, May 18, 2010
project #14: reusable lunch bag
This project has been on my To-Do list for over 2 months. I first saw the tutorial for it online who knows how long ago and ordered the oil cloth fabric for it at the end of February. I have enough to make like 10 or something, but this is numero uno. The idea is that this fabric is sturdy and water proof so that it'll make a great reusable lunch bag. It's better than those insulated ones because a) it's lighter-weight, b) I made it myself!
The bag in the tutorial has the wrong side of the fabric inside, but I didn't like how that looked, so I doubled the fabric so that it was the same inside and out. I used some olive green thread as a contrasting color because I liked how it looked and I didn't want to be bogged down trying to find the perfect yellow match. The tutorial bag also used a zig-zag stitch which I am really not a fan of: I think it makes everything look amateurish. (My stuff doesn't need any more help with that, thank you very much.)
As you can see, the bag itself is a little oblong and not symmetrical. I'm not exactly sure how that happened, but I'm not super worried about it since it's just for personal use. Also it's a lunch bag.
Here's the bottom. It's also a little uneven: you can see that the right seam is longer than the left one. Again, not exactly sure how that happened other than inexact measurements. The oil cloth is hard to cut exactly right because it's so slippery so measurements and cuts weren't quite as perfect as they could have been.
Maybe when I make a few more I'll figure out how to take care of those inconsistencies...
Saturday, May 15, 2010
project #13: key stationery
My friend Stephanie and I have been friends for our whole lives. Our families lived in Brooklyn together and even though we've moved around several times since then and we now live across the country from each other she is one of my best friends. Here we are in our Brooklyn days. Can you pick us out? Let me give you a hint: I am the tallest (as always) and Steph is the shortest. (Fact: she still comes up to my shoulder.)
In our older years we joined a gang. An old man gang. No tattoos, just pseudonyms and fancy back stories. Stephanie is Harold Miller. I am Ronald Foster. We had other cohorts, one with the name of Paul Burton. Here we are on a regular day. Also Halloween. Check out our amazing facial hair. We made it, er, grew it ourselves.
Right now dear Harold is stuck in the arctic cold of Idaho and is without a job. She is also not taking classes. She is bored out of her gourd. SO we are going to become pen pals. SO I made some stationery to write my letters on. SO I can't wait to get her first letter (she said it's already in the mail) so that I can send her one of these!
I inked actual keys to stamp onto the paper and made a whole serious of them with all different keys. Then I used my amazing re-set-able stamp to stamp "Dear Harold" across the top of each one.
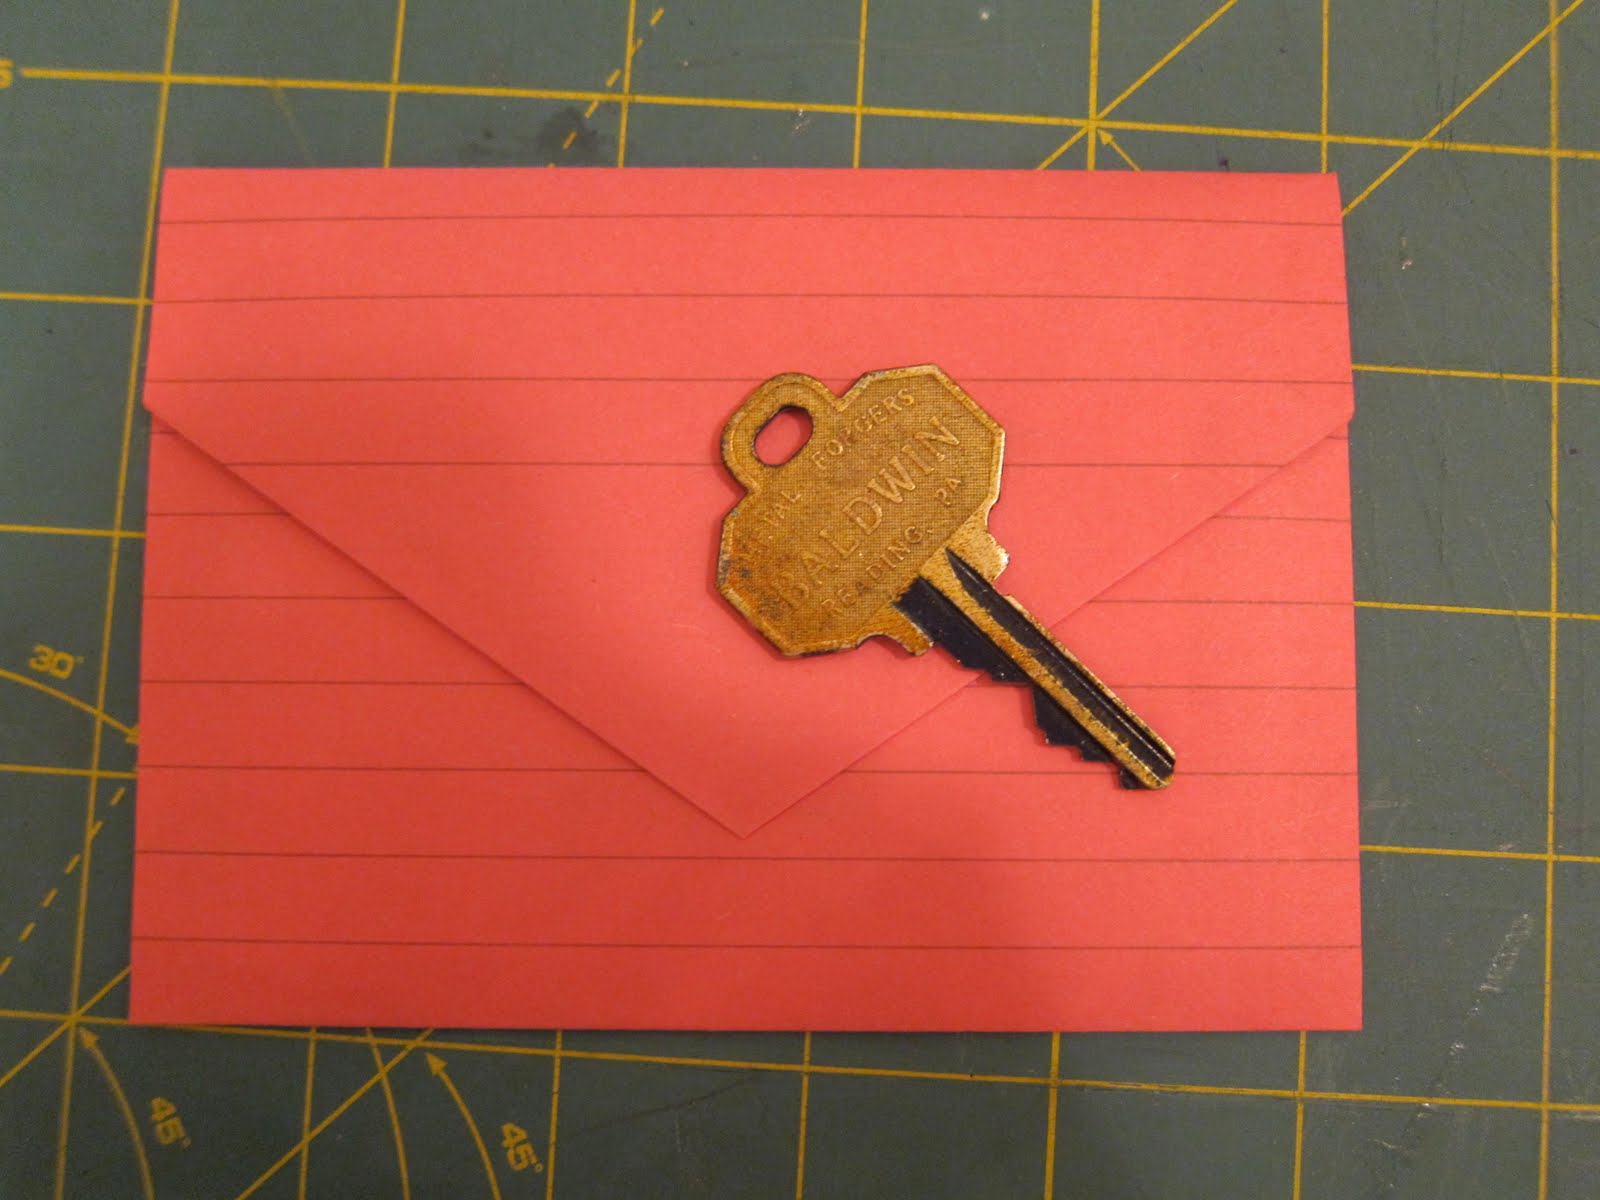
I also hand folded a series of envelopes to house the stationery in. I made them 3.5 in. by 5 in. which is the exact size of the smallest envelope that is allowed through the US Postal system. Fun fact. On the flip side I hand set a stamp with Harold's mailing address so I could just stamp it on each envelope, but I won't show you that because then you'd know where she lives... And this is the internet, people.
Here are some more of the pages with the key stamps that I used. I made twelve in total (though only 9 are pictured here) and they are all different. I have to say that I am sort of in love with this.
In our older years we joined a gang. An old man gang. No tattoos, just pseudonyms and fancy back stories. Stephanie is Harold Miller. I am Ronald Foster. We had other cohorts, one with the name of Paul Burton. Here we are on a regular day. Also Halloween. Check out our amazing facial hair. We made it, er, grew it ourselves.
Right now dear Harold is stuck in the arctic cold of Idaho and is without a job. She is also not taking classes. She is bored out of her gourd. SO we are going to become pen pals. SO I made some stationery to write my letters on. SO I can't wait to get her first letter (she said it's already in the mail) so that I can send her one of these!
I inked actual keys to stamp onto the paper and made a whole serious of them with all different keys. Then I used my amazing re-set-able stamp to stamp "Dear Harold" across the top of each one.
I also hand folded a series of envelopes to house the stationery in. I made them 3.5 in. by 5 in. which is the exact size of the smallest envelope that is allowed through the US Postal system. Fun fact. On the flip side I hand set a stamp with Harold's mailing address so I could just stamp it on each envelope, but I won't show you that because then you'd know where she lives... And this is the internet, people.
Here are some more of the pages with the key stamps that I used. I made twelve in total (though only 9 are pictured here) and they are all different. I have to say that I am sort of in love with this.
Friday, May 14, 2010
project #12: key earrings
A few years ago I was dating a boy from my lovely home state of New Jersey. We had known each other for years but only started dating one summer while I was home from school. But fall came as it always does and I had to leave to go back to the far away state of Utah to further my secondary education. So as a way to continue to build our relationship while we were apart we sent packages back and forth with little presents we made, along with a book I made for us to write messages or stories or draw pictures in. Whenever I would come home from class and see that package on our front steps I would get so excited, I can't even tell you.
This boy would make me the best things, from a t-shirt with an elephant that said "I'm elephantastic" to a music box player that played a song he'd written for me, he was an amazing gift giver. Though we broke up almost two years ago, I still wear a lot of the stuff he gave me, including these amazing key earrings made from diary or luggage keys!
I've wanted to make some of these for a while now; not for myself, but to put in my etsy shop to share the joy of key earrings with the world! I pulled out my glass jar full of keys today for another project (project #13) and I ran across two sets of small keys. They aren't quite as small as the ones the old boyfriend made for me, but I think they turned out just fine. (Side note: I just realized as I uploaded this picture that it is a picture of keys ON keys. Oh how I love accidental puns!)
Subscribe to:
Posts (Atom)